Ever wanted to build something eye-catching that makes people do a double take as they walk by? A 3D LED billboard is a great project that’ll have people stopping in their tracks. You’ve probably seen examples of these popping up in cities around the world. The good news is, that with some basic electronics knowledge and the right components, you can create your own 3D LED billboard at home.
Ready to get started? Let’s dive in and build something eye-popping! Your 3D LED billboard is about to turn heads on your street.
What Is Naked-Eye 3D?
Unlike 3D which requires special glasses, naked-eye 3D uses optical illusions to trick your brain into perceiving depth in flat 2D images. Two of the most common techniques are parallax barriers and lenticular lenses.
Parallax barriers place a barrier mask over an image with multiple perspectives. As you move your head, each eye sees a different perspective, creating a 3D effect. Lenticular lenses use ribbed, lens-like sheets placed over an interlaced image. The lenses direct a different image to each eye based on the viewing angle.
To make an LED billboard pop in 3D, you’ll want to use one of these methods to create separate left-eye and right-eye images that your brain will fuse into a single 3D image.
How to make a 3D LED display?
· Designing the Images
First, you’ll need to take two photos of the same scene from slightly different angles, just like your eyes see the world from two different angles. The greater the difference in angle, the more extreme the 3D depth effect. Shoot for an angle difference of 2 to 6 degrees for natural-looking 3D.
You’ll then need to interlace or arrange these left-eye and right-eye images behind the parallax barrier mask or lenticular lens sheet on your LED display. Make sure any images that cross viewpoints are properly aligned. Test and make adjustments to the image spacing and angle as needed to optimize the 3D effect for viewers.
With the right equipment and carefully crafted images, your naked-eye 3D LED billboard is sure to turn heads and captivate audiences with its eye-popping realism. Take the time to get it right, and your 3D ads will be noticed like never before.
· Planning Your 3D LED Billboard
Planning is key to creating an eye-catching 3D LED billboard. Consider these things before you start construction:
Dimensions
How big do you want to make the billboard? Bigger is usually better for visibility and impact. A minimum of 10 to 15 feet wide and 6 to 10 feet tall is good for most areas. Make sure it is proportional to the surrounding buildings and will fit properly in your selected location. Consider how far away viewers will be to determine appropriate font and image sizes.
Viewing Angles
For the best 3D effect, the billboard needs to be visible from multiple angles. The ideal is at least 30 to 45 degrees on either side of straight on. Wider angles, up to 90 degrees, are even better. This allows parallax to work as the viewer’s perspective changes. Keep your content and images optimized for viewing from various angles.
Lighting
Bright LED lighting is essential for an eye-catching display, especially at night. Use high-intensity LED modules, at least 6000 to 8000 Nits or more. Place the lights close together, no more than 1 to 2 inches apart. Include lighting for any text or images on the sides and back of the billboard for the best visibility from all angles.
With some upfront planning, you’ll be well on your way to building an attention-grabbing 3D LED billboard. Keep your message simple, make it highly visible day and night, and optimize it for viewing from multiple angles to achieve the most dramatic 3D effect. Your popping display is sure to turn heads!
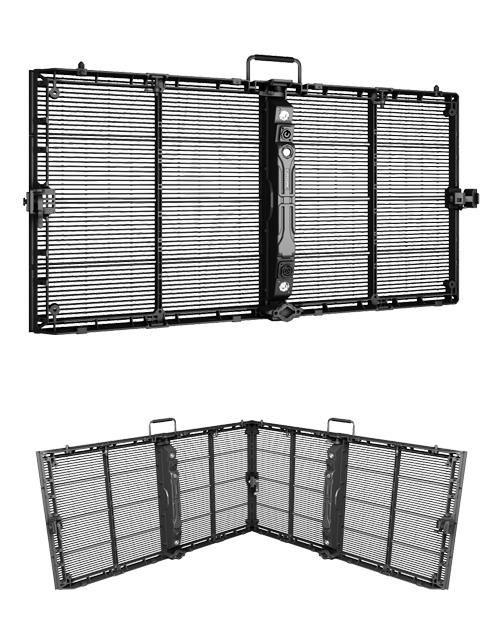
· Building the LED Panel Frame
To build the frame that will hold your LED panels in place, you’ll need aluminum profiles, corner brackets, and mounting hardware.
Aluminum Profiles
The frame is made up of aluminum profiles that connect each LED panel. Choose profiles that match the size of your LED panels. For most 3D billboards, 30mm to 50mm wide profiles are used. Get profiles that are at least 3 meters long so you have enough to connect panels both vertically and horizontally.
Corner Brackets
Corner brackets join the aluminum profiles together at 90-degree angles. They allow you to securely connect the frame pieces in all four corners. Look for brackets specifically meant for joining aluminum profiles.
Mounting Hardware
You’ll need mounting hardware to attach the frame to a wall or other surface. If attaching to a wall, use wall mounts or anchors that can support the weight of your frame and LED panels. For a freestanding display, you may want to consider heavy-duty mounts so you can move the billboard to different locations.
Assembling The Frame
- Hoist the frame into position and secure it to the wall or other mounting surface.
- Attach your LED panels to the front of the frame. Most panels come with mounting kits for attaching to aluminum profiles.
- Your LED panel frame is now complete and ready for your 3D display! Let your creative ideas come to life on this blank canvas.
Programming and Setting Up the 3D Visual Effects
To create a 3D effect, you need to program and set up the LED panels. The key is to manipulate the pixels to give an illusion of depth. Here are the basic steps:
· Adjust the Perspective
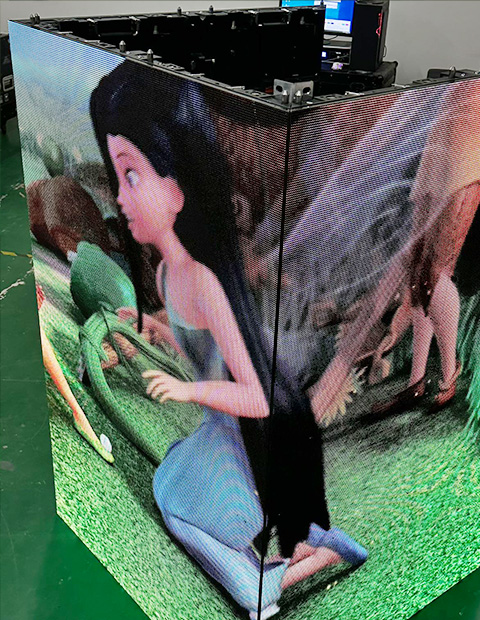
You need to make the pixels farther away appear smaller, just like in real 3D space. Use a 3D modeling program to design a virtual 3D shape, like a cube. Then map the LED panels onto each face of the shape. Program each panel so the pixels become progressively smaller for panels that represent surfaces farther away. This tricks the eye into perceiving depth.
· Create Parallax
Parallax is the effect of objects appearing to move at different speeds based on their distance. Program the panels so the pixels representing closer surfaces move faster than those for surfaces farther away. For example, as a viewer moves past the display, make the pixels on the front surface move quickly from right to left, while the rear surface pixels move slower. This enhances the 3D illusion.
· Add Shadows and Shading
Apply shading and simulated shadows to the pixels. Darker pixels for areas facing away from the light source and lighter pixels for areas facing the light. As a viewer moves, update the shading in real-time. Shadows that move and change as in the real world strengthen the 3D effect.
· Consider Viewing Angle
Keep in mind the optimum viewing angle for maximum 3D impact. Typically, directly in front of and a bit to the side of the center of the display works well. Program the pixels so the 3D effect is optimized for viewers in this sweet spot. The effect may start to break down for those too far off to the side.
By combining perspective, parallax, shading, and optimizing for viewing angle, you can create an LED display that pops right out at viewers. With some experimentation, you’ll be displaying realistic 3D shapes, objects, and even short animations in no time! The possibilities for eye-catching visuals are endless.
Conclusion
So there you have it, all the steps needed to make your very own 3D LED billboard to wow your customers or just impress your friends. While it may seem complicated, if you take it step by step and don’t get overwhelmed it’s totally doable. Just get the right supplies, map out your design, solder and assemble the panels, and program the Arduino, and you’ll be displaying 3D images and video on your new billboard in no time. The end result will be a vibrant, eye-catching display that brings your message to life. If you get stuck, don’t hesitate to reach out to your local maker community for help. Now get out there, be bold and creative, and build something that makes a statement! The future is 3D.